一.环境准备
zabbix是基于LAMP或者LNMP架构的监控软件。本次安装基于LNMP,Linux+Nginx+Mysql+Php(提前配置阿里云yum源)
1.关闭防火墙和selinux
#关闭防火墙
systemctl stop firewalld.service
#关闭安全机制
setenforce 0
vim /etc/selinux/config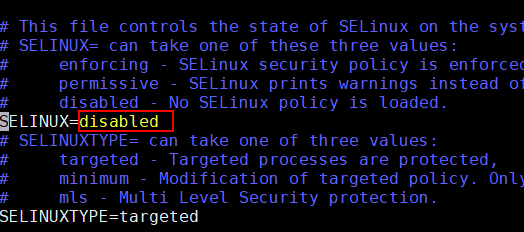
2.安装所需要的依赖
#安装MySQL相关依赖
yum -y install gcc-c++ mysql-devel net-snmp-devel libevent-devel
二.安装MySQL8.0(RPM)
1.使用rpm来进行安装。可以在mysql的repo源仓库右键复制指定版本的数据库。
wget http://repo.mysql.com/mysql80-community-release-el7-1.noarch.rpm
安装mysql80-community-release-el7-1.noarch.rpm包
rpm -ivh mysql80-community-release-el7-1.noarch.rpm
安装完成后会在 /etc/yum.repos.d文件夹里面获得两个文件:mysql-community.repo && mysql-community-source.repo
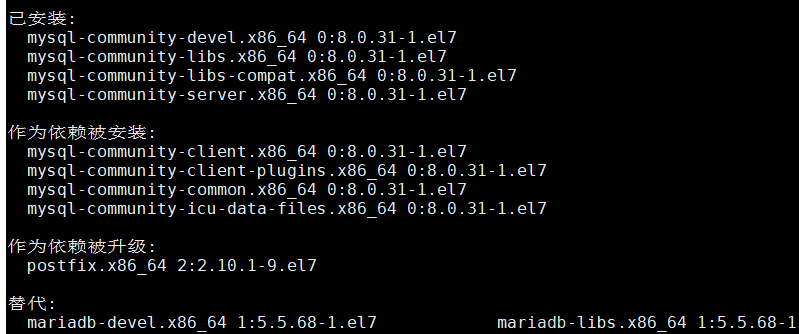
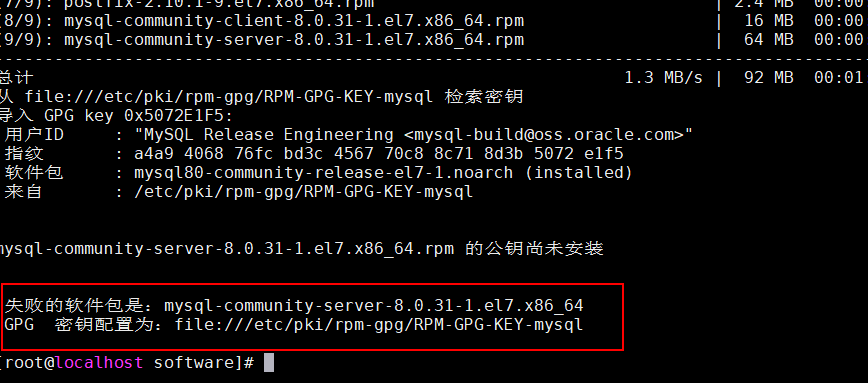 报了个错误 直接 yum install mysql-server --nogpgcheck 安装即可
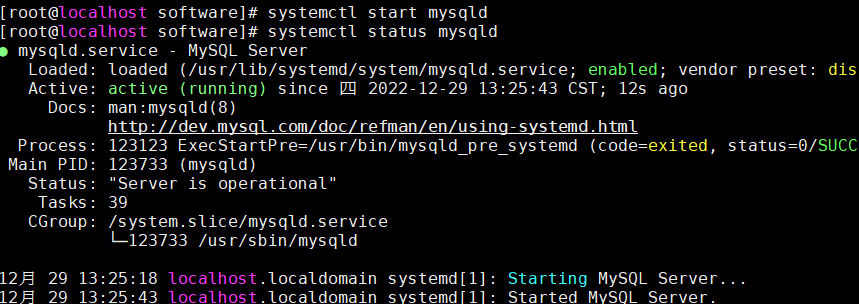
2.启动mysql
systemctl start/status/enabled mysqld
3.初始化数据库 查看初始密码
mysqld --initialize
cat /var/log/mysqld.log|grep pass

4.登录mysql 修改密码
mysql -u root -p alter user 'root'@'localhost' identified by 'Zabbix#0574110';
5.开启MySQL远程链接
三.安装php
1.首先需要在Centos7系统上安装并启用EPEL和Remi存储库
yum install [https://dl.fedoraproject.org/pub/epel/epel-release-latest-7.noarch.rpm](https://dl.fedoraproject.org/pub/epel/epel-release-latest-7.noarch.rpm)
yum install [http://rpms.remirepo.net/enterprise/remi-release-7.rpm](http://rpms.remirepo.net/enterprise/remi-release-7.rpm)

### 2.安装yum-utils
3.安装php
yum-config-manager --enable remi-php74
yum -y install php php-cli php-common php-gd php-json php-ldap php-mbstring php-mysqlnd php-pdo php-xml php-devel php-embedded php-mcrytp php-pecl-mongodb php-pecl-redis php-pecl-memcached php-opcache php-fpm php-bcmath
4.查看
php -v
5.启动/查看开机自启
systemctl start/status/enabled php-fpm四.安装nginx
1.配置repo源
vim /etc/yum.repos.d/nginx.repo
2.安装nginx
yum-config-manager --enable nginx-mainline
yum install -y nginx
3.启动nginx
systemctl start nginx 检查Nginx配置文件:nginx -t 平滑重载:systemctl reload nginx
4.导入数据到zabbix
或者进入到数据库的页面,导入数据库
cd /usr/local/zabbix/database/mysql/
五.编译安装zabbix
安装依赖
yum -y install mysql-devel pcre-devel opensll-devel
1.进入解压安装包的目录
cd zabbix
2.编译安装
// --sysconfdir=/etc/zabbix/ 指定配置文件的目录
// --enable-server 安装的是服务端
./configure --sysconfdir=/etc/zabbix/ --enable-server --with-mysql --with-net-snmp --with-libxml2 --with-ssh2 --with-openipmi --with-zlib --with-libpthread --with-libevent --with-openssl --with-ldap --with-libcurl --with-libpcre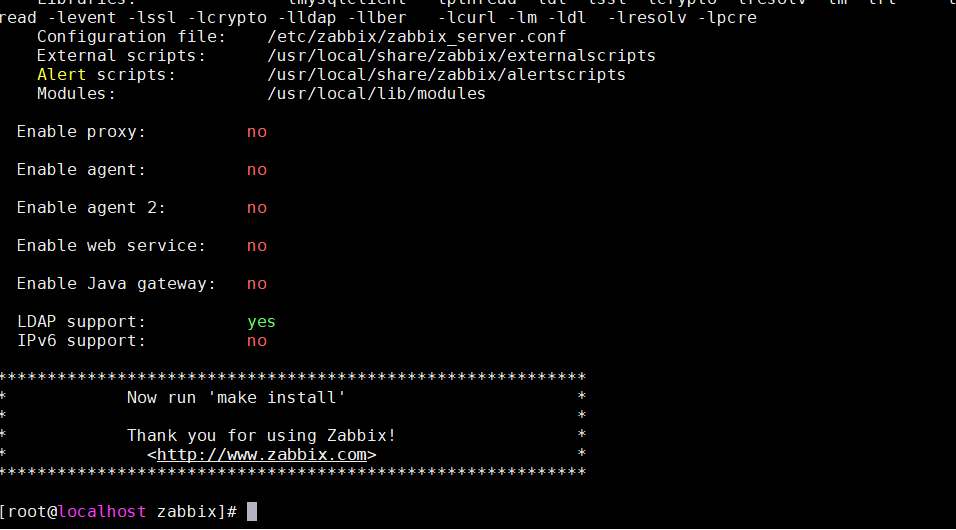
make install
创建用户组
groupadd --system zabbix
创建用户
useradd zabbix -g zabbix -s /sbin/nologin
3.创建 zabbix-server.service 文件
vim /usr/lib/systemd/system/zabbix-server.service
systemctl start zabbix-server.service
systemctl status zabbix-server.service

systemctl enable zabbix-server.service
4.安装完成后,修改 zabbix_server.conf 配置文件
5.安装 web 页面
/usr/local/zabbix/
mkdir -p /app/code/zabbix
cp -r ui/* /app/code/zabbix
Nginx 配置vim /etc/nginx/conf.d/default.conf
vim /etc/php.ini
修改post_max_size为16M
修改max_execution_time为300
修改max_input_time为300
然后重启php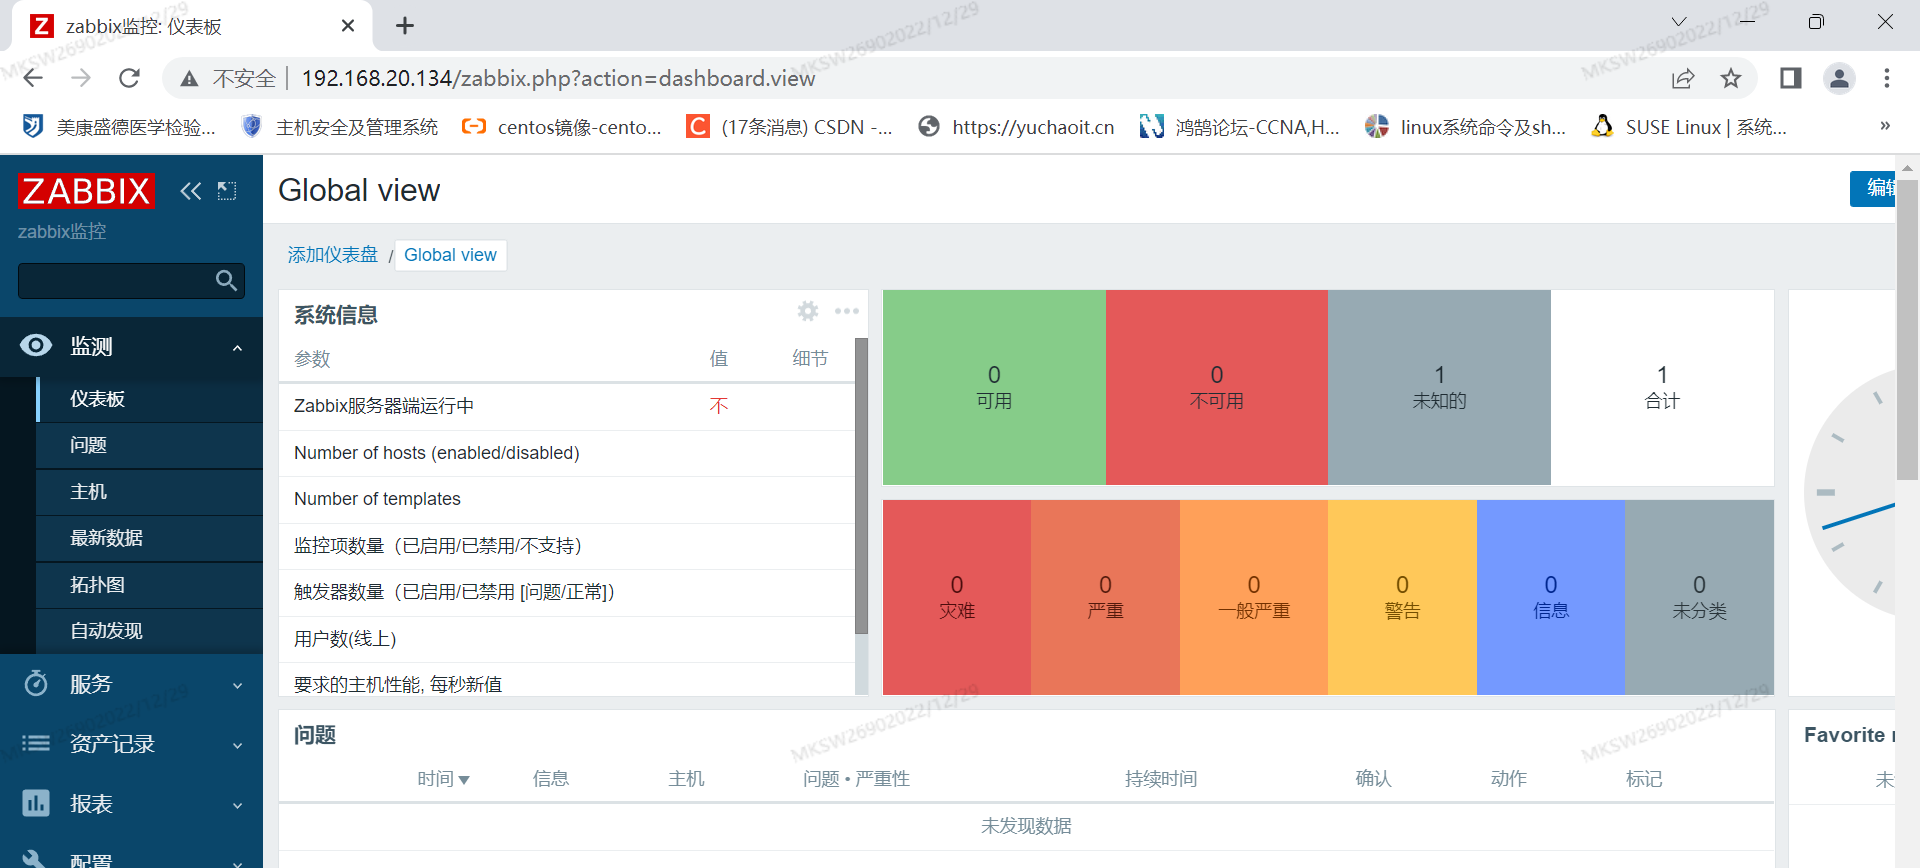 搭建完成mksw@2023
六.安装zabbix客户端
1.配置官方repo
rpm -Uvh https://repo.zabbix.com/zabbix/6.0/rhel/7/x86_64/zabbix-release-6.0-4.el7.noarch.rpm
yum clean all
2.安装zabbix-agent2
yum install zabbix-agent2 -y
3.修改zabbix_agent2.conf配置文件
sed -i 's#Server=127.0.0.1#Server=192.168.20.134#g'   /etc/zabbix/zabbix_agnet2.conf
修改Server= zabbix-server地址
修改ServerActive=zabbix-server地址
Hostname=本机计算机名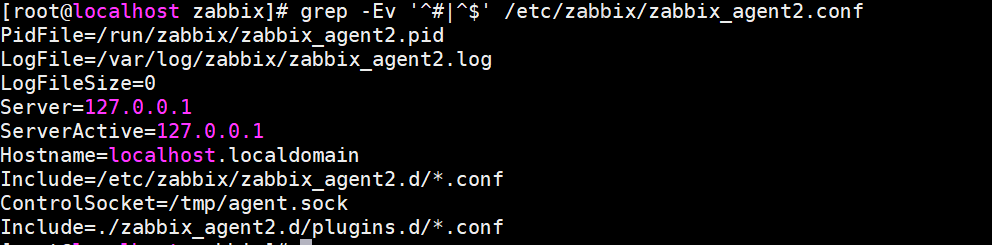
4.启动zabbix-agent2
systemctl restart zabbix-agent2
systemctl enable zabbix-agent2
linux防火墙开启的话需要放通10050端口
firewall-cmd --add-port=10050/tcp
firewall-cmd --permanent --add-port=10050/tcp
5.检测测试连通性(服务端操作)
yum install -y zabbix-get
zabbix_get -s '127.0.0.1' -p 10050 -k 'agent.ping' -
-
6.Windows安装客户端
双击安装
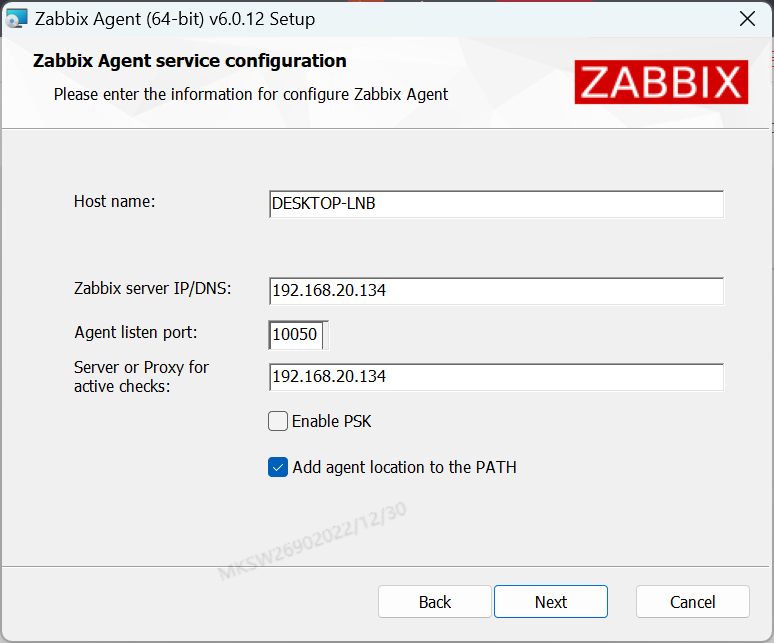
直接安装Windows Server防火墙开启需要放通10050端口
7.脚本安装
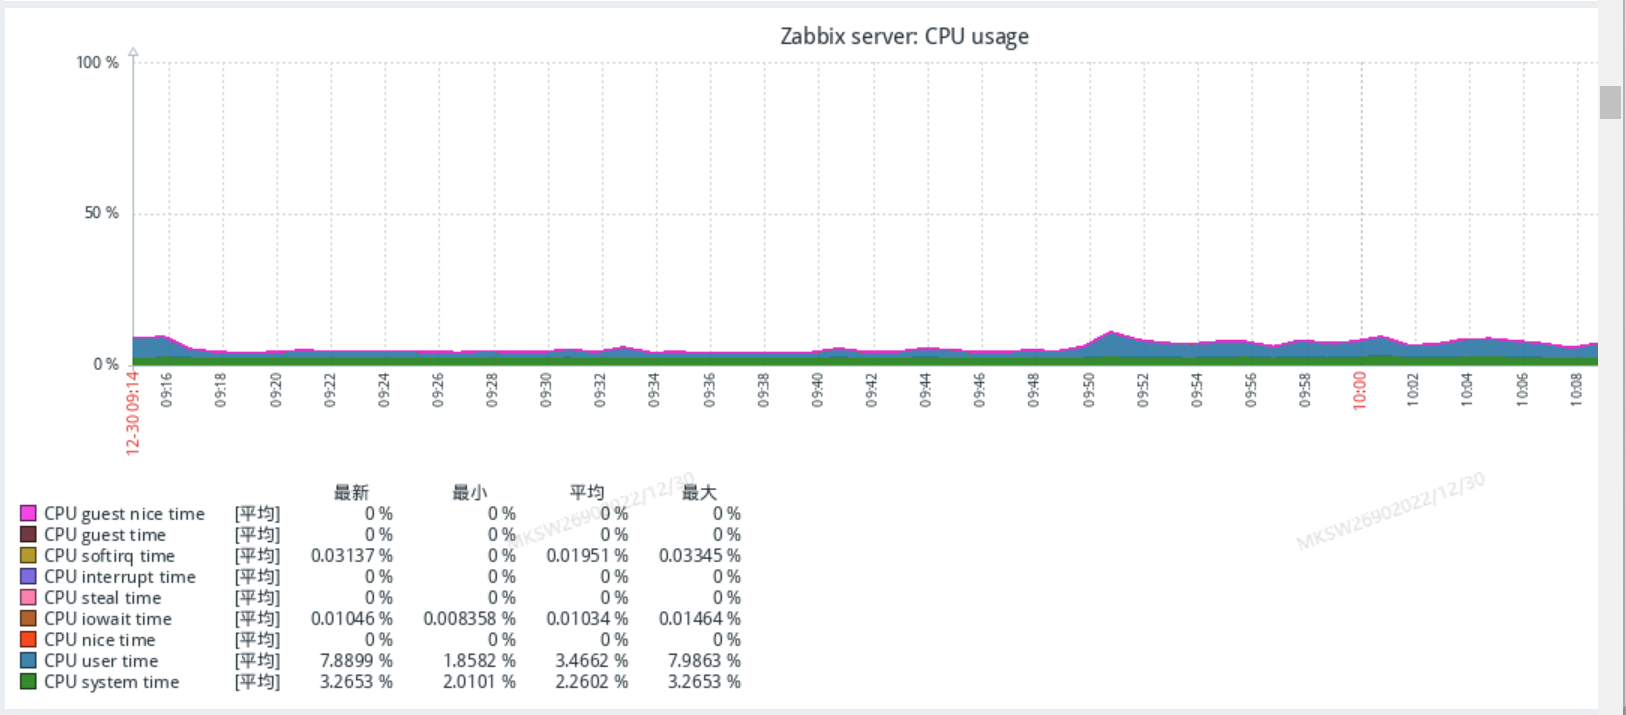
七.解决web端乱码问题
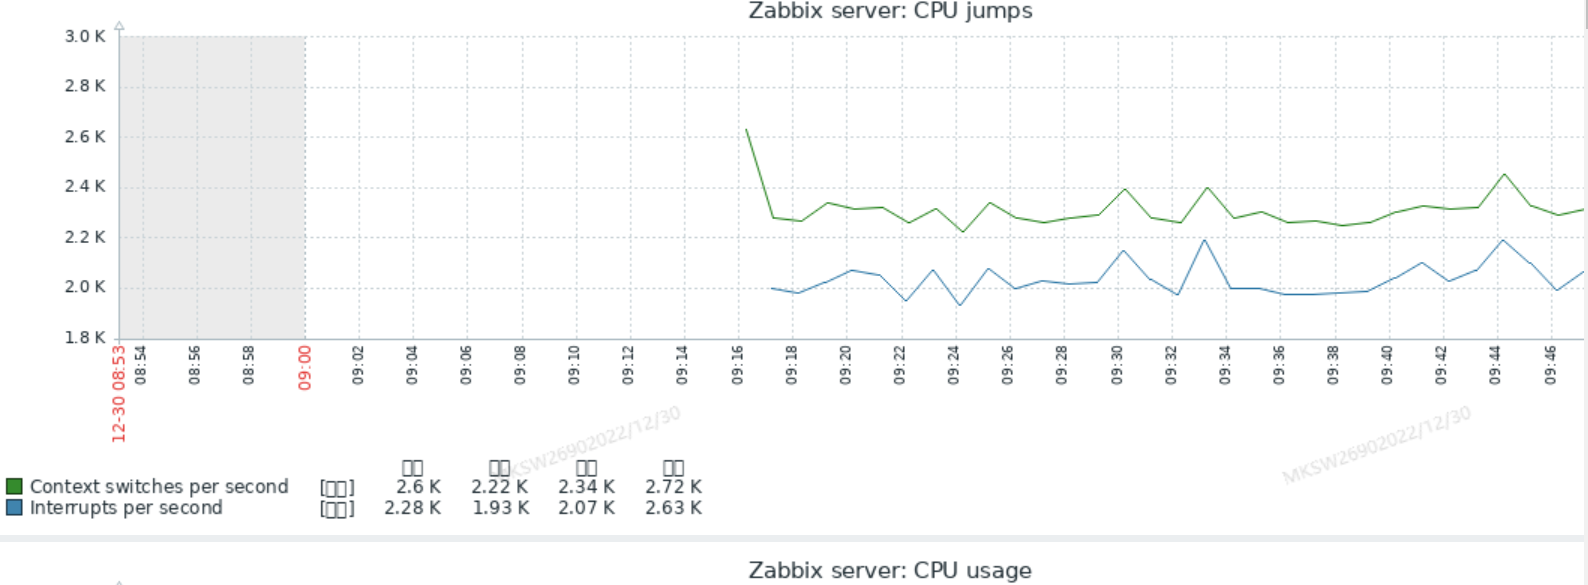
1.安装字体
yum install -y wqy-microhei-fonts
2.替换字体
\cp /usr/share/fonts/wqy-microhei/wqy-microhei.ttc /app/code/zabbix/assets/fonts/DejaVuSans.ttf
也可复制Windows的字体
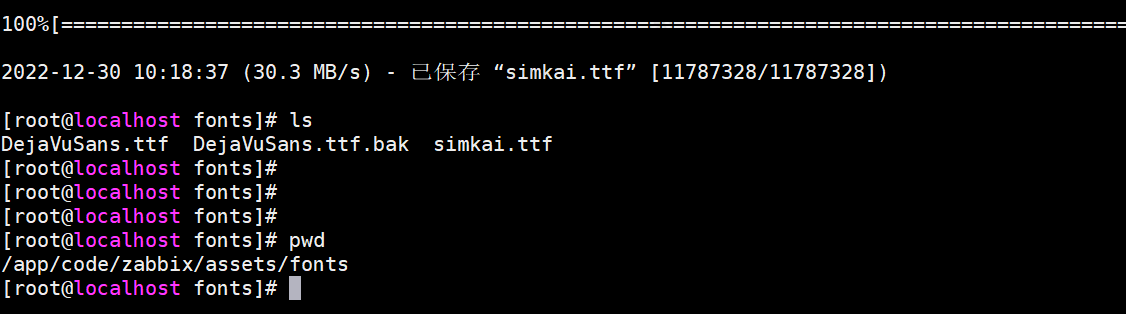
重命名 mv simkai.ttf DejaVuSans.ttf 重启服务 systemctl restart zabbix-server.service nginx php-fpm.service
八.邮件告警设置
1.配置mail
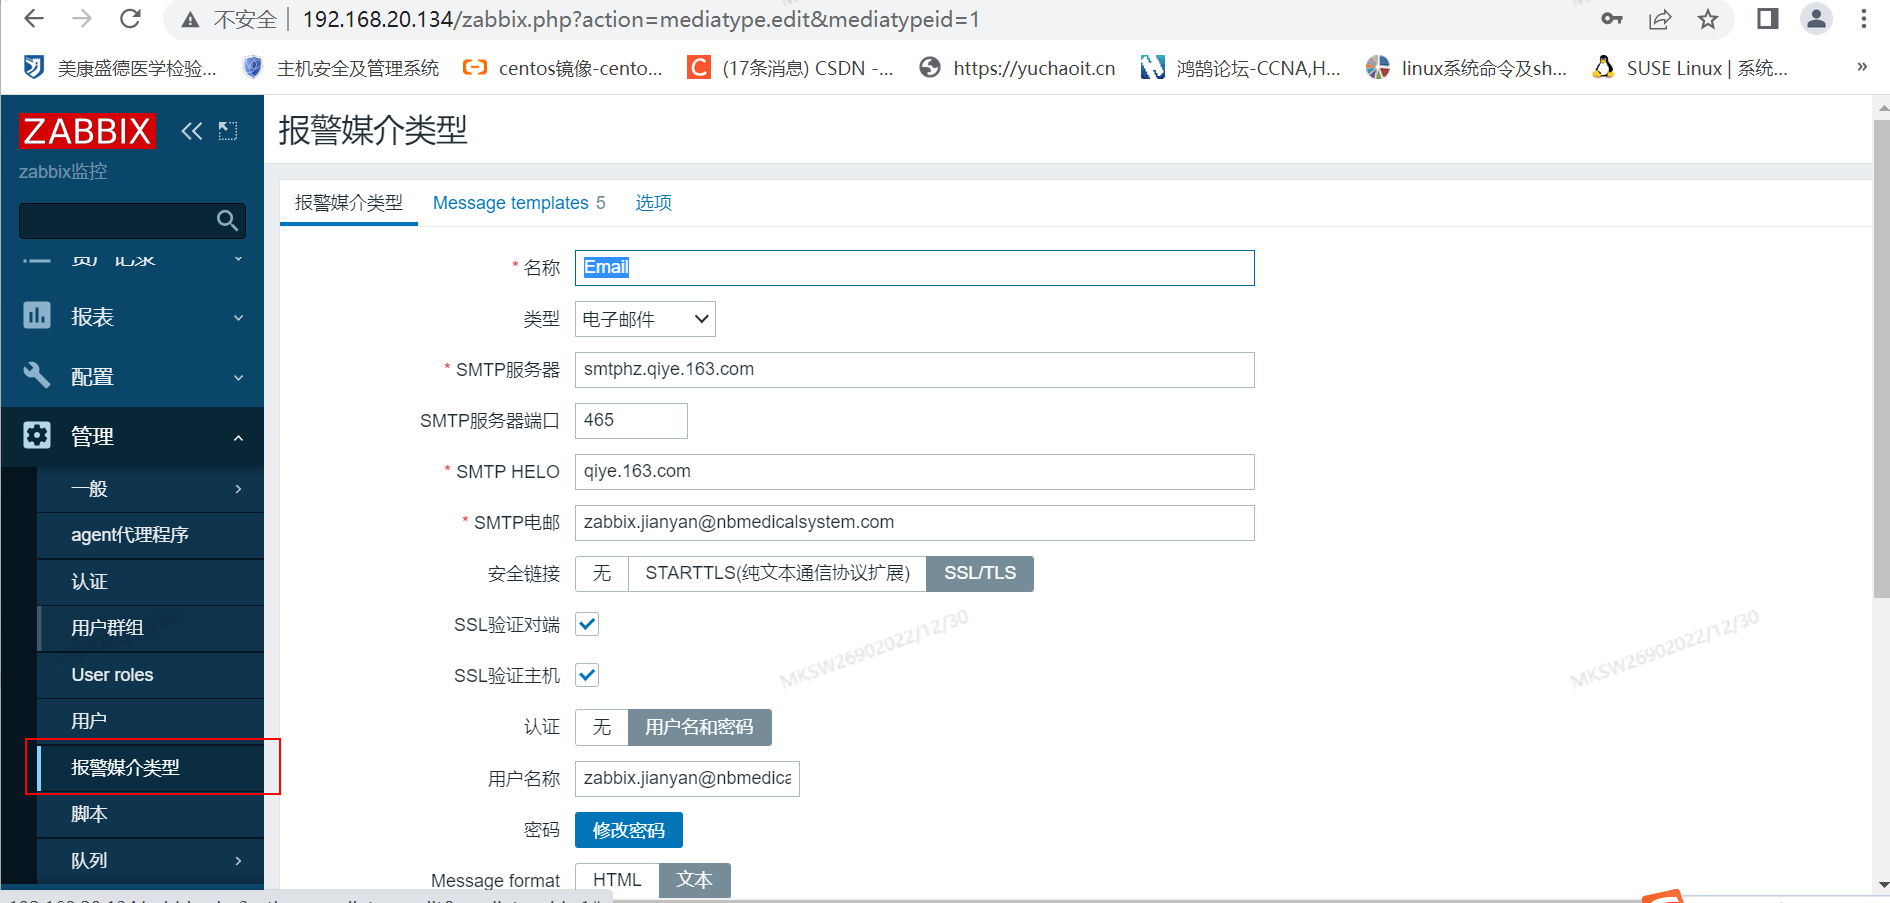
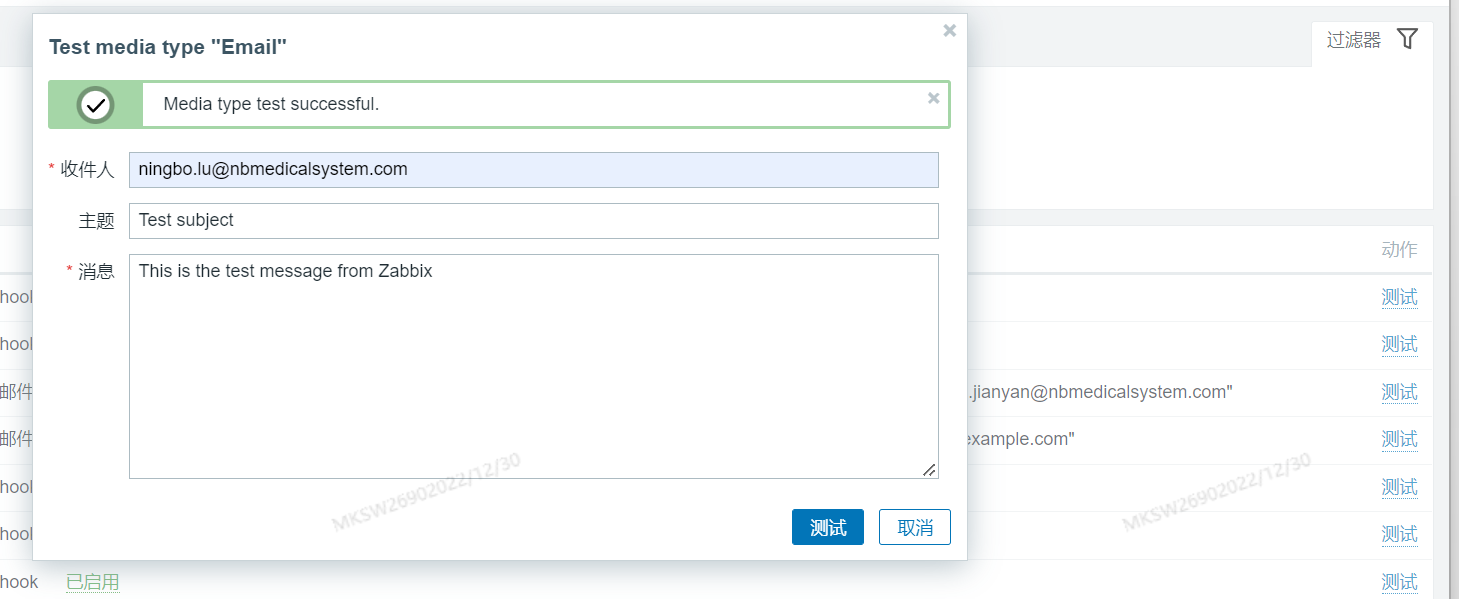
2.添加收件人
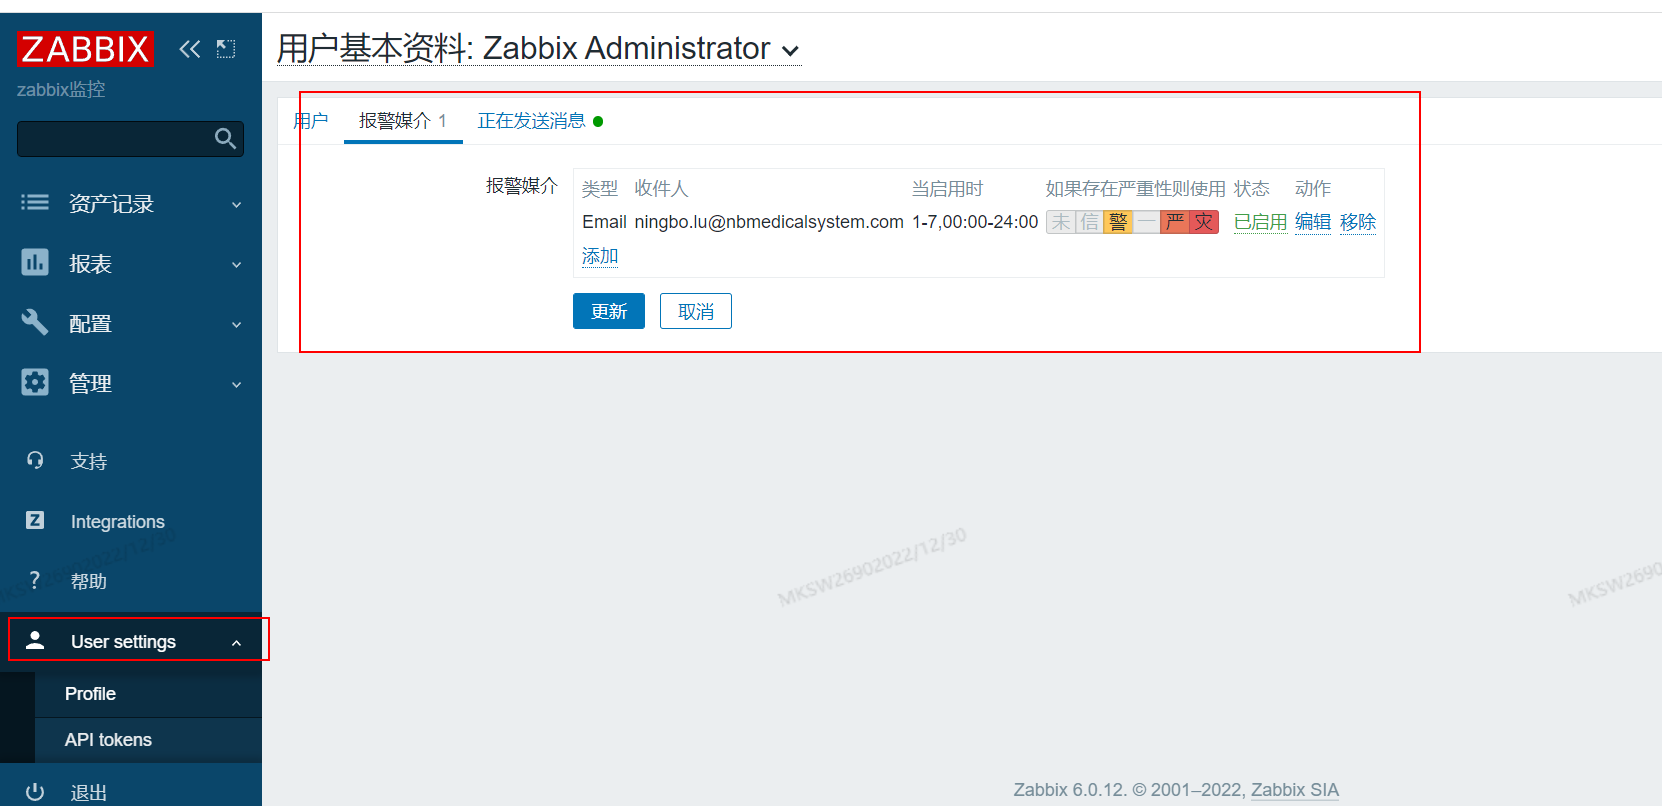
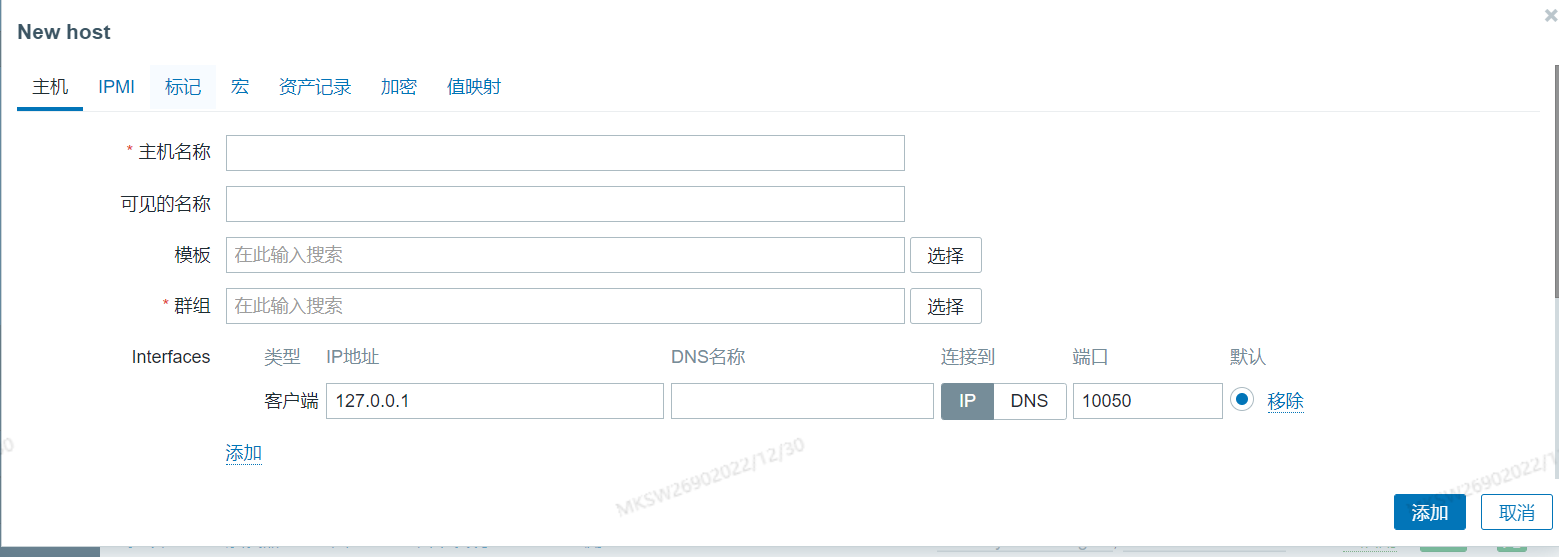
九.Web端添加主机
十.升级
1.从旧环境Zabbix数据库导出 mysqldump 文件
(1)导出数据配置,排除历史数据和趋势数据
mysqldump -uroot -p --databases zabbix --ignore-table=zabbix.history --ignore-table=zabbix.history_log --ignore-table=zabbix.history_str --ignore-table=zabbix.history_text --ignore-table=zabbix.history_uint --ignore-table=zabbix.trends --ignore-table=zabbix.trends_uint > /opt/zabbix_config.sql(2)导出排除数据的表结构
mysqldump -d zabbix -uroot -p --tables history history_log history_str history_text history_uint trends trends_uint > /opt/ zabbix_data.sql2.mysqldump 导入数据
mysql -uroot -p zabbix < /opt/zabbix_config.sql mysql -uroot -p zabbix < /opt/zabbix_data.sql